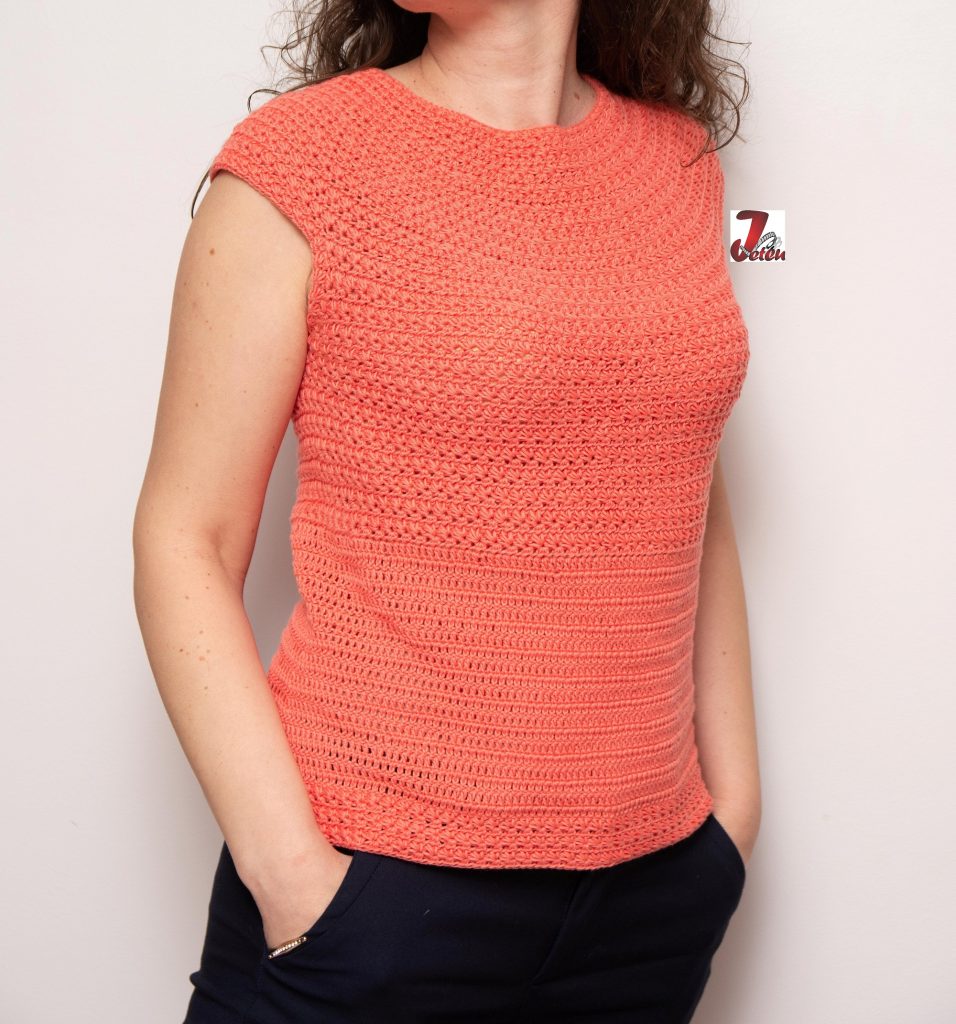
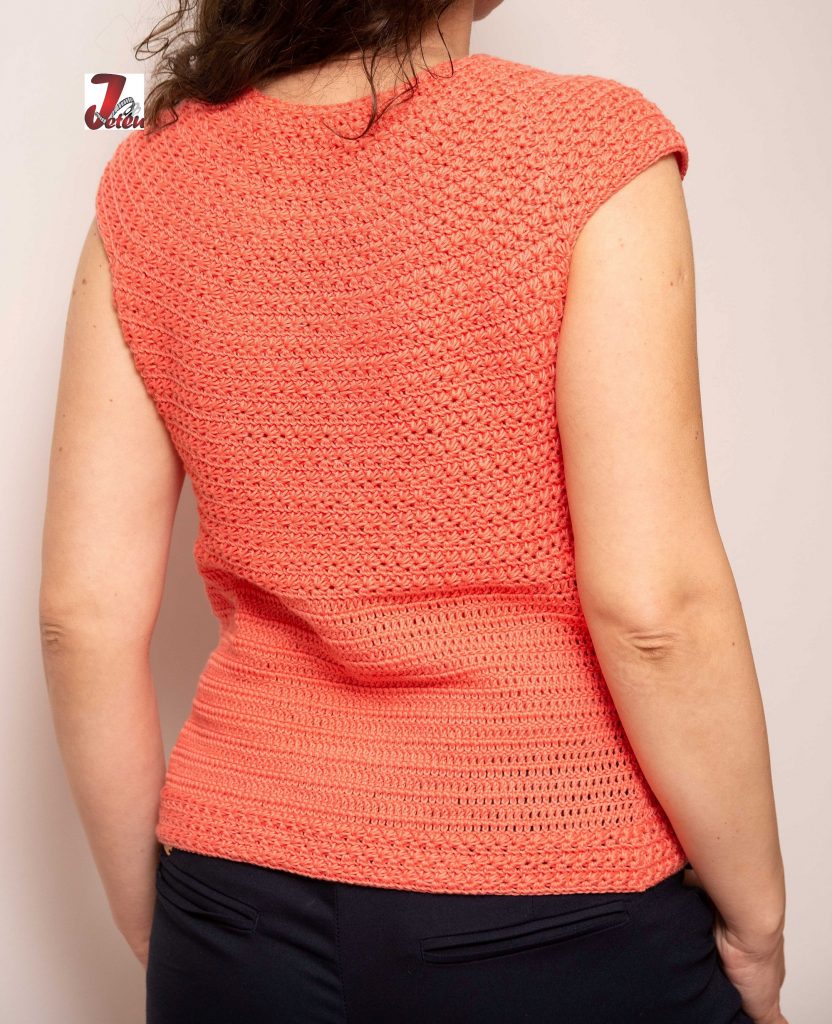
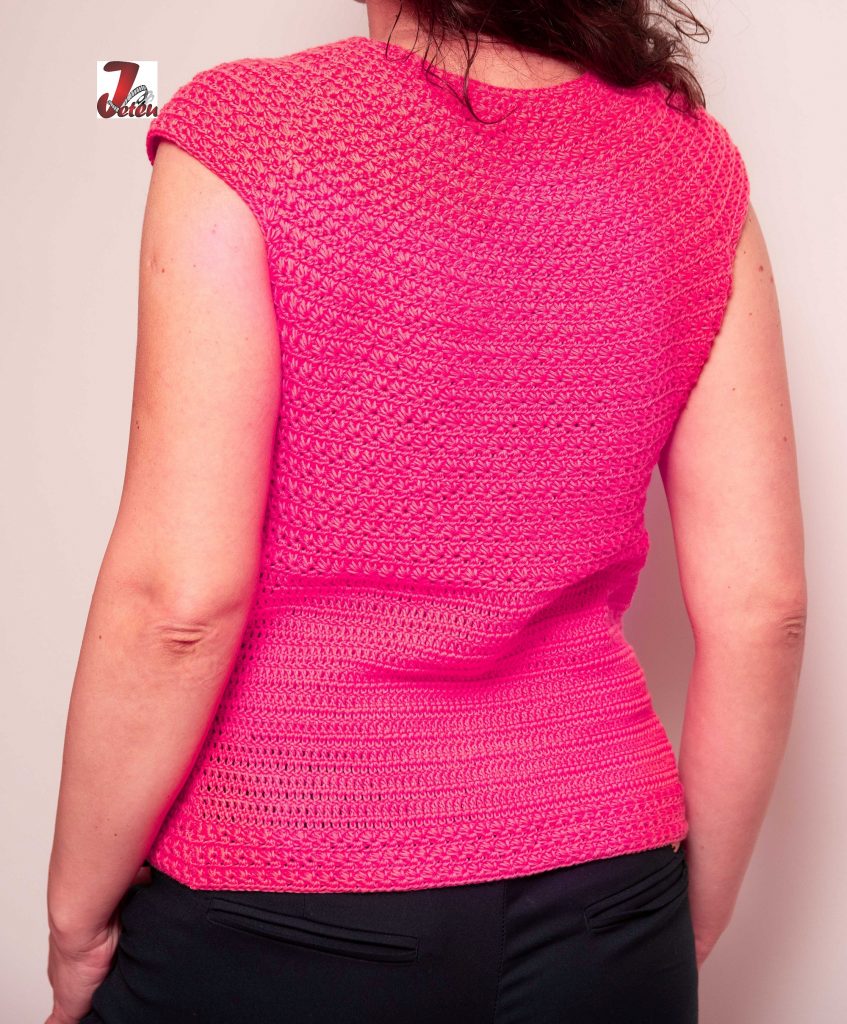
A crocheted blouse perfect for summer, a unique model that will make you feel special.
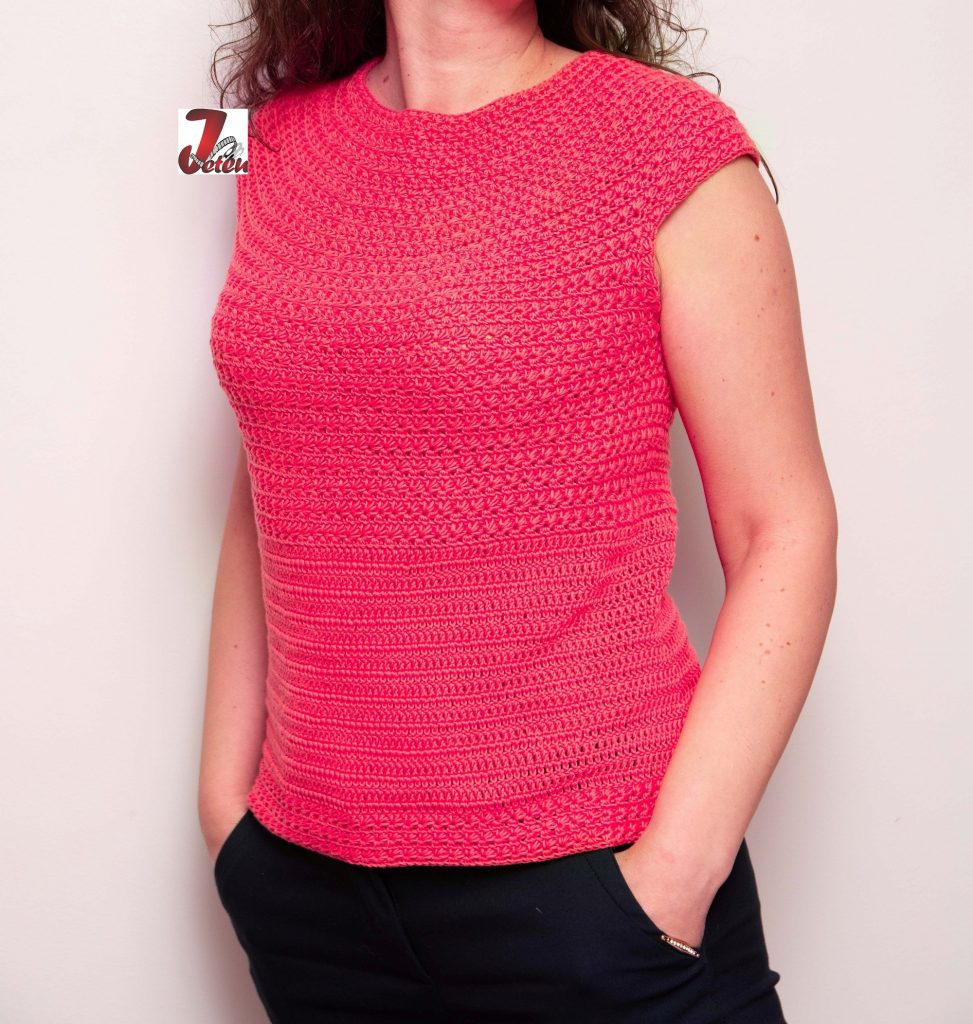
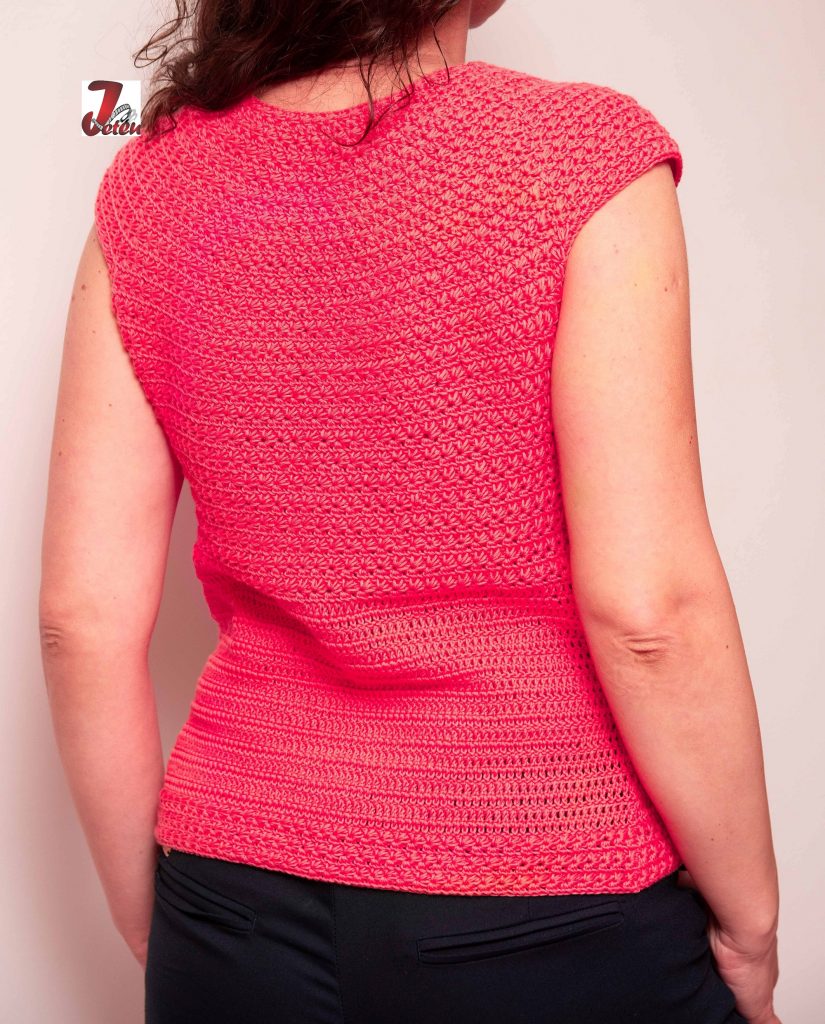
It is a simple blouse , crocheted from top to bottom, starting with a round yoke with a star pattern that allows adjustment according to the required size. But this star stitch gives it a delicate and unique look.
As you know, I have used this stitch in many of my projects. I find it super special and I am very happy when I see that it can be combined in so many ways. Be sure that you will see it in other projects too.
Today's tutorial is as complex as the ones so far, having of course the video tutorial, pictures from the moments of work and explanations described step by step.
To follow the projects as easily as possible, I invite you to
- subscribe to the youtube channel: JETEU
- Like the Facebook page: JETEU-Lucru de mana
- join Facebook group: Jeteu-totul despre crosetat
For this blouse I used100% cotton yarn: Alize Bella - coral, approx. 230 gr and I crocheted with a 2.5mm crochet hook. It is size 38-40, but it can be adapted to any size, especially due to the round yoke with which it is started, which allows its measurement even during work.
Video tutorial - crocheted blouse-round yoke-star stitch
Step by step - crocheted blouse - round yoke - star stitch
How do we make the star stitch modelul steluta:
for the star pattern we need a multiple number of stitches of 2
Odd row:
- start the row with 3 ch
- apart from the chain on the crochet hook, we must pull one loop through each of the next 5 consecutive stitches, so that we have 6 loops on the crochet hook, then we pull a loop through all 6 stitches to complete the half of the star;
- continue the same until the end of the row
- finish the row with 1 half double crochet stitch
Even row:
- 2 ch stitches
- make 2 hdc half double crochet stitch in each stitch that closed each half of the star in the previous row;
- end the row with 1 hdc into the last stitch
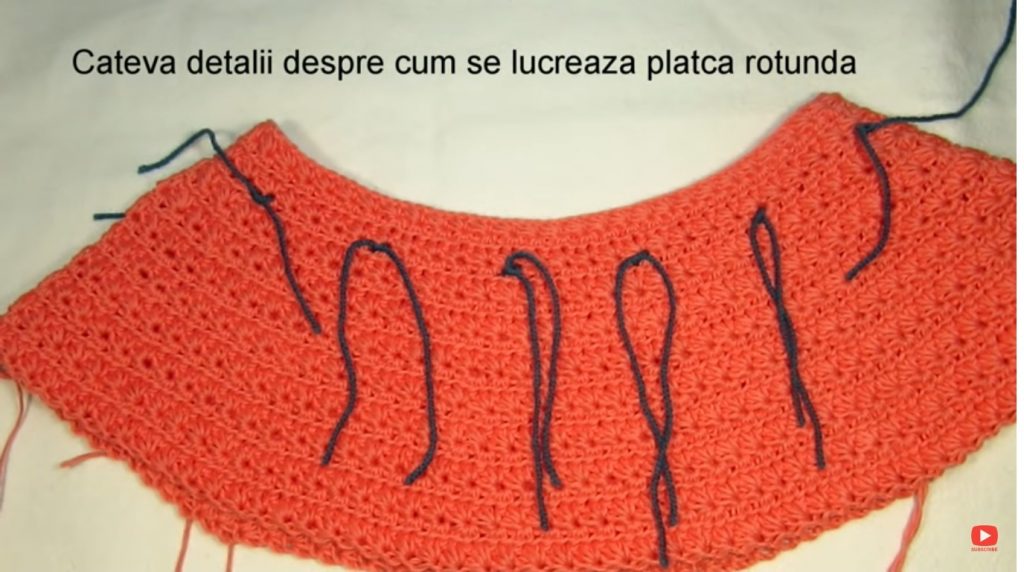
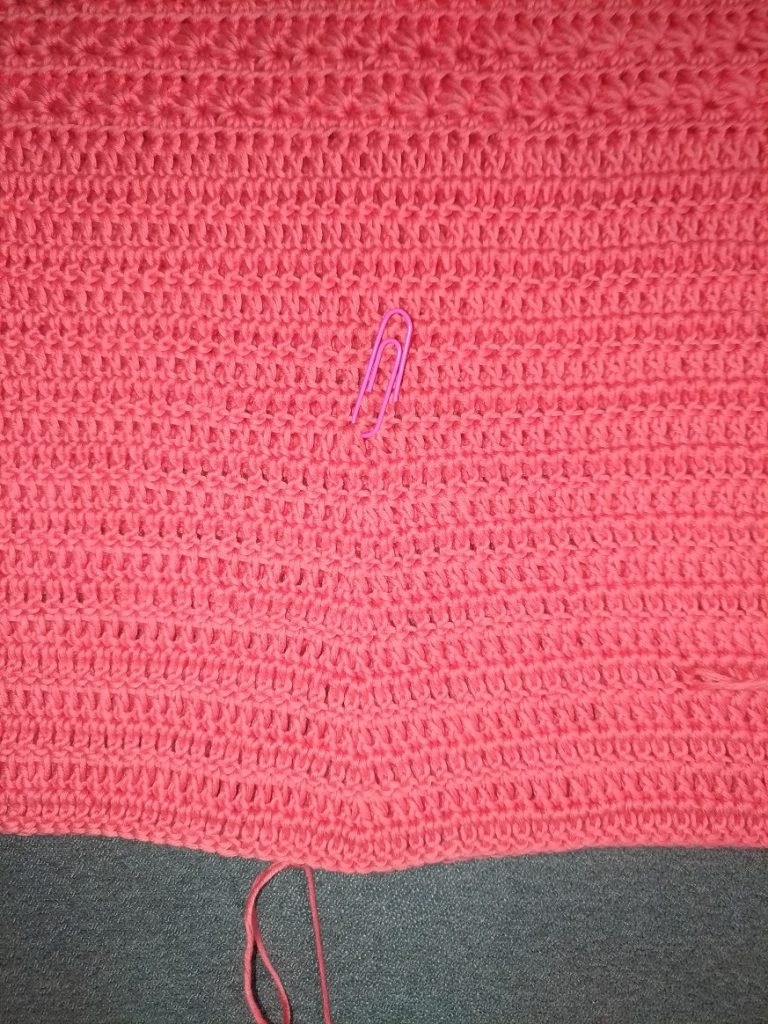
ROUND YOKE:
For our blouse we start with 120 chain stitches. We work all around, joining the end with the beginning and turning the other face at each end of the row. Thus, at the end of the first two complete rows we will have 60 stars. I started with this number of stitches because I made a sample and depending on it and how large I want the neckline to be, I calculated with a simple mathematical rule how many stitches I need.
Row 1 and 3:
- start the row with 3 ch
- apart from the chain on the crochet hook, we must pull one loop through each of the next 5 consecutive stitches, so that we have 6 loops on the crochet hook, then we pull a loop through all 6 stitches to complete the half of the star; continue the same until u end the row.
- end the row with 1 slip stitch
Row 2:
- 2 ch stitches
- make 2 hdc half double crochet stitch in each stitch that closed each half of the star in the previous row;
- end the row with 1 slip stitch
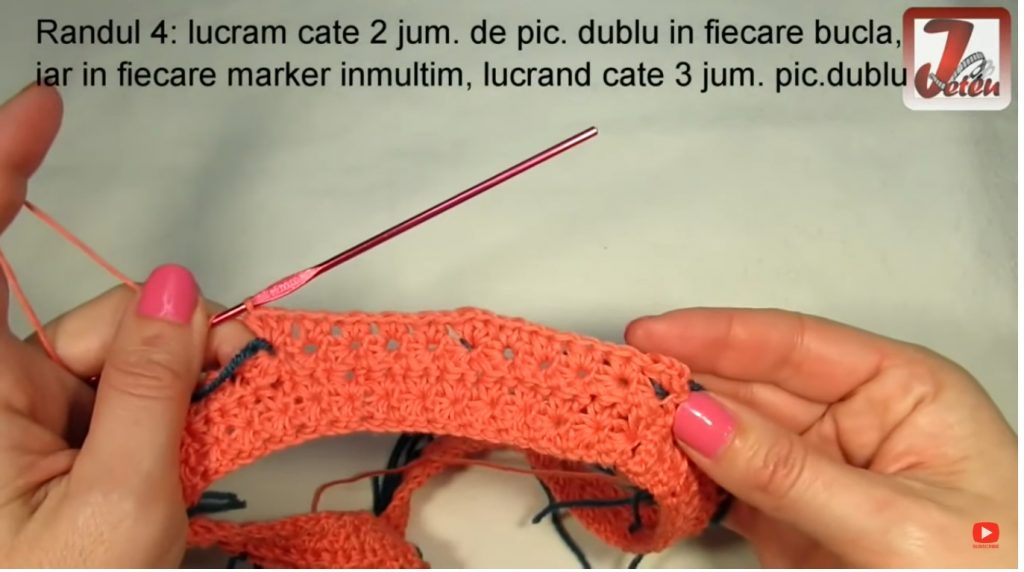
Row 4:
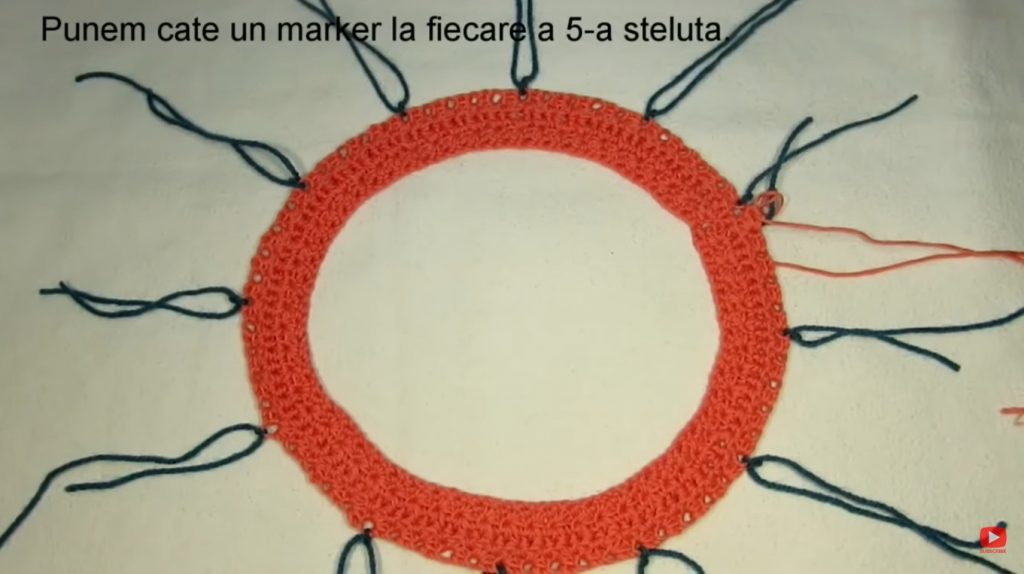
- we divide the number of stars by putting a marker on each 5th star and we add 1 half of a double crochet stitch,
- 2 ch stitches
- 2 hdc in every loop half double crochet stitch in each chain that closed each half of the star in the previous row, and where we have a marker we work 3 hdc
- totally we added 12 hdc so we have 132 stitches
- end the row with 1 slip stitch
Row 5, 7, 9, 11, 13, 15, 17, 19: we crochet the halves of the star, normally each of 6 loops, in each stitch.
Row 6, 8, 10, 12, 14, 16, 18, 20
- we work with hds, adding stitches next to the markers, on one row on their left, on the next on their right.
- to each row add 12 hdc.
- la sfarsitul platcii rotunde am adaugat 12 picioruse la fiecare rand par, incepand cu randul 4, dec in total 108 picioruse, astfel avem un rand cu 228 picioruse.
Here you have a separate round yoke tutorial
https://www.youtube.com/watch?v=cLq3CbsxikQ&t=24s
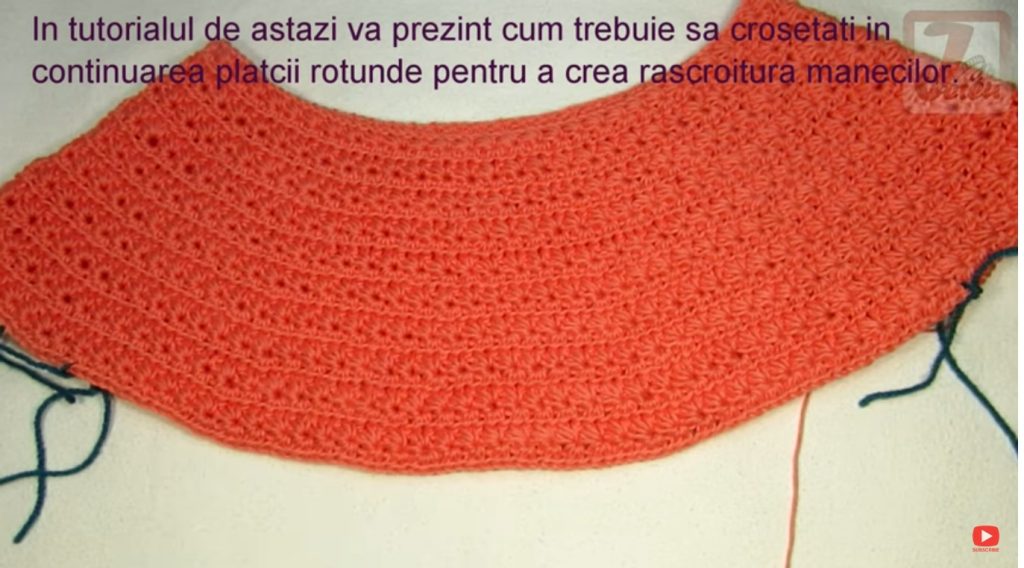
How to continue after the round yoke?
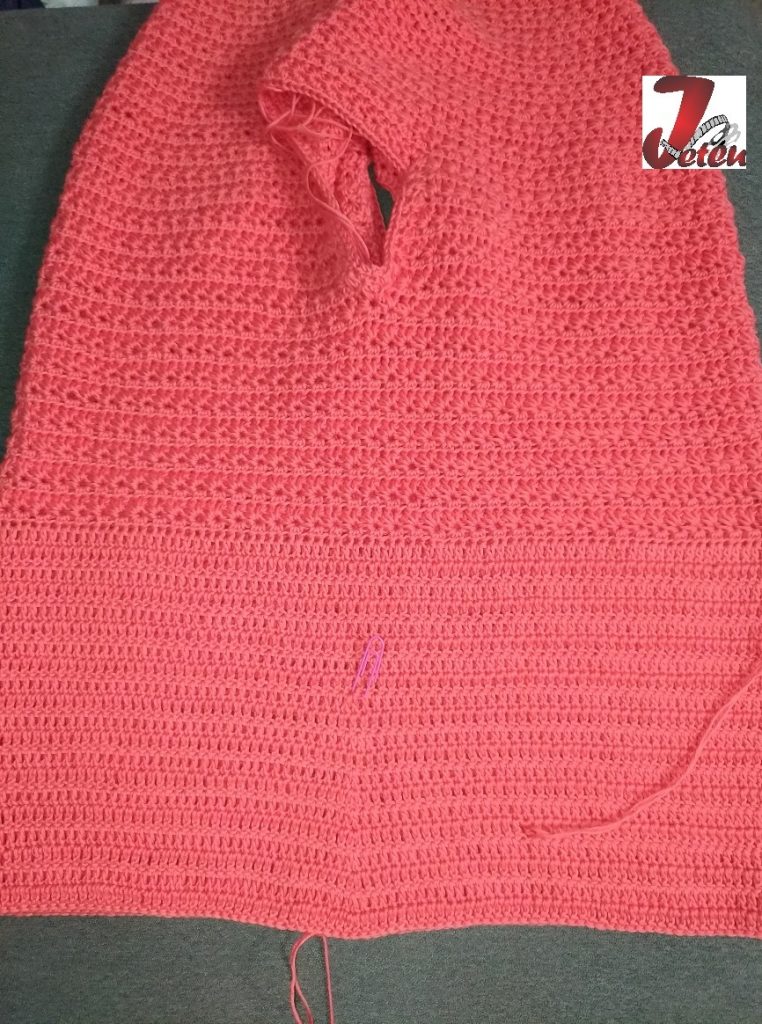
After we have finished the round yoke we have to continue separately the front and the back to create the cut of the sleeve. If the round yoke is higher and allows the direct separation of the sleeves, u can continue like that, but in our case I chose to continue working a few rows of "partially" raglan to increase the number of stitches to the underarm of the blouse.
Because the anatomy of the body shows us that the front is always bigger than the back, we have to work on the clothes as well.
Respecting this, we divided the 228 stitches as follows:
228 sts: 6 => 38 sts for each sleeve
38×2 = 76 -3 = 73sts for back side
38×2 = 76+3 = 79 sts for front part

Count the stitches and place markers to separate the front and back of the sleeves.
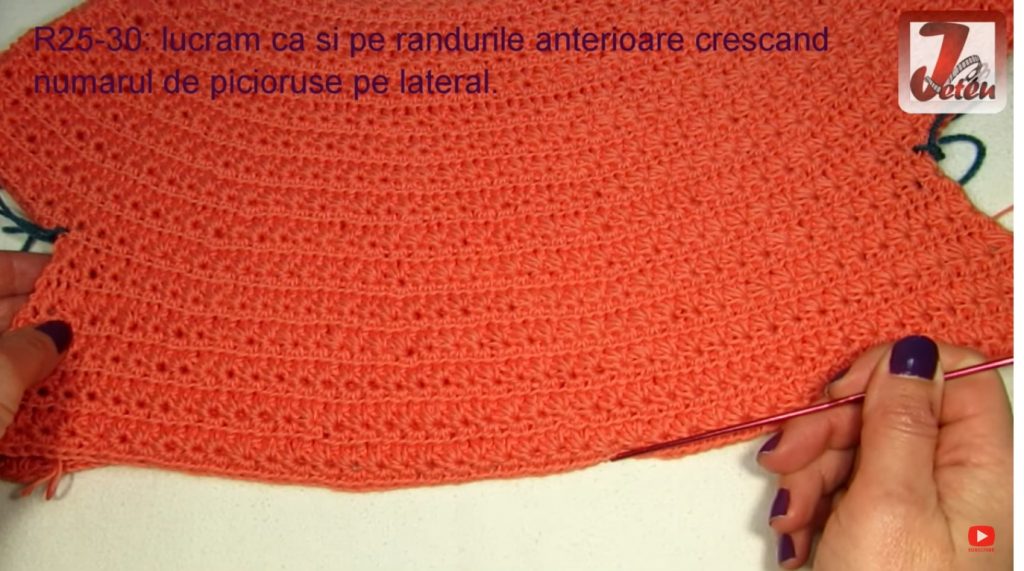
Row 21, 23, 25, 27, 29: we work separately only on the side of the front and back with the star pattern, without adding stitches. Be careful on which side of the blose you start row 21, you have to have the work facing you.
Row 22, 24, 26, 28, 30: we work normally with hdc, adding 1 half double crochet stitch to each beginning and end of the row.
Here you will find the separate video tutorial for how we can continue after we have finished the round yoke: https://www.youtube.com/watch?v=_fGixx9u4TY&t=34s
The body of the blouse
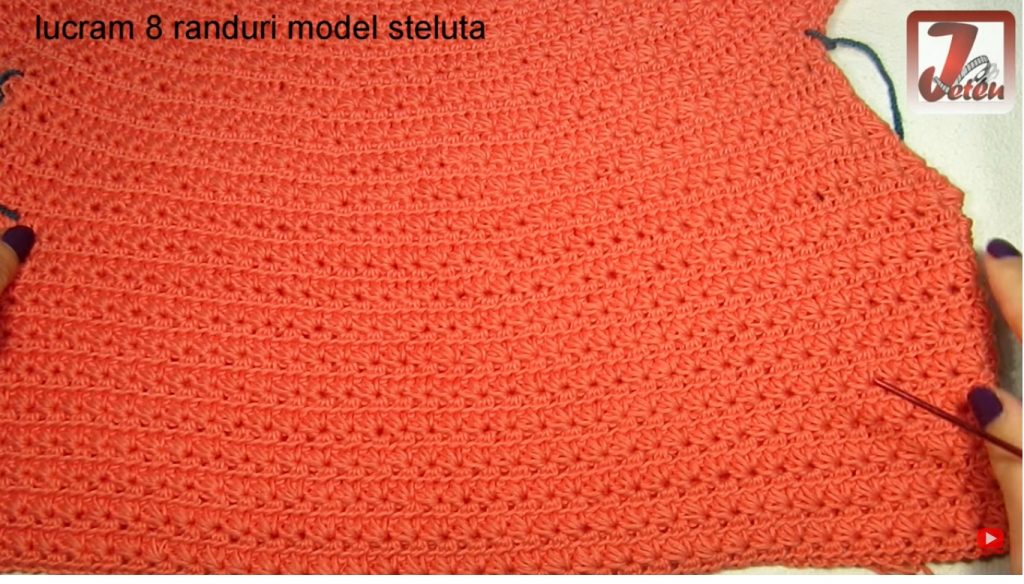
Row 31: we continue with the star pattern and join the two parts, the front with the back thus creating the opening of the sleeves.
Row 32: We work with half double crochet stitch to complete the star pattern, without adding stitches.
Row 33-46: we continue with the star pattern.
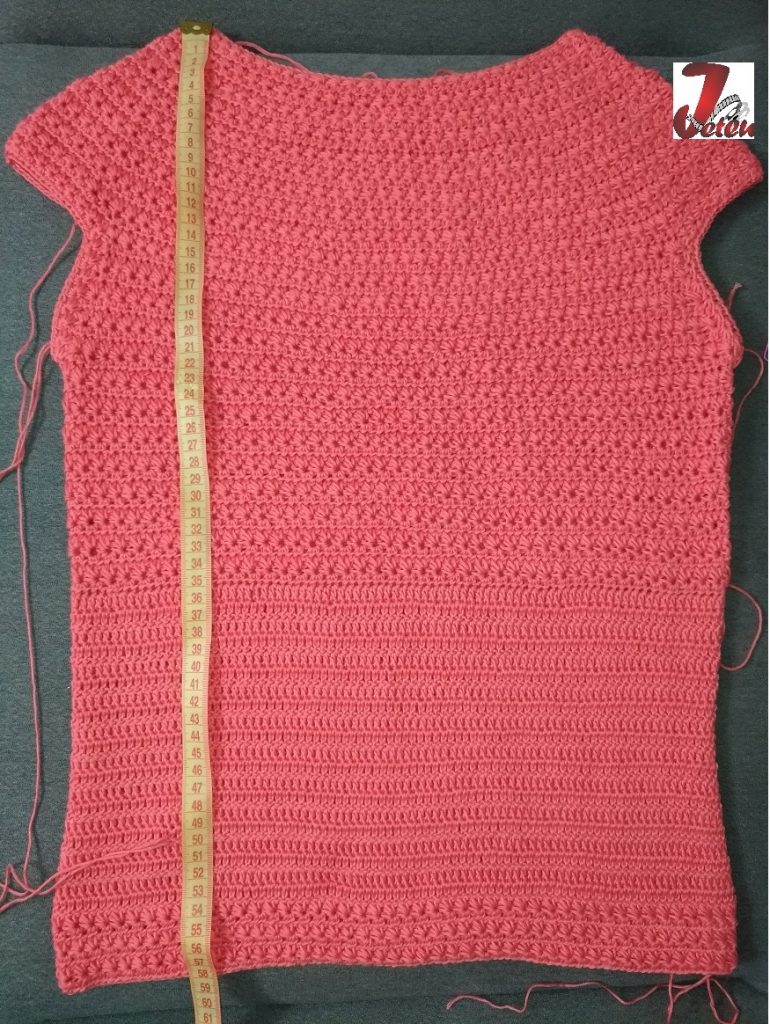
Row 47-66: we work with double crochet stitches
- start every row with ch stitches, that is considered as a stitch
- we return at the beginning of each row, we do not work on the same face, so we avoid to see the stitches going diagonally.
- in the first 8 rows with double crochet stitch I did not add any extra stitches.
- R55: we add 1 double crochet sts both to the right and to the left of the blouse
- R56: we work without adding sts
- R57: we add 1 double crochet sts both to the right and to the left of the blouse
- R58: we work without adding sts
- R59-66: we add 1 double crochet sts both to the right and to the left of the blouse
Row 67-72: we work 3 rows star stitch, without increasing the number of stitches.
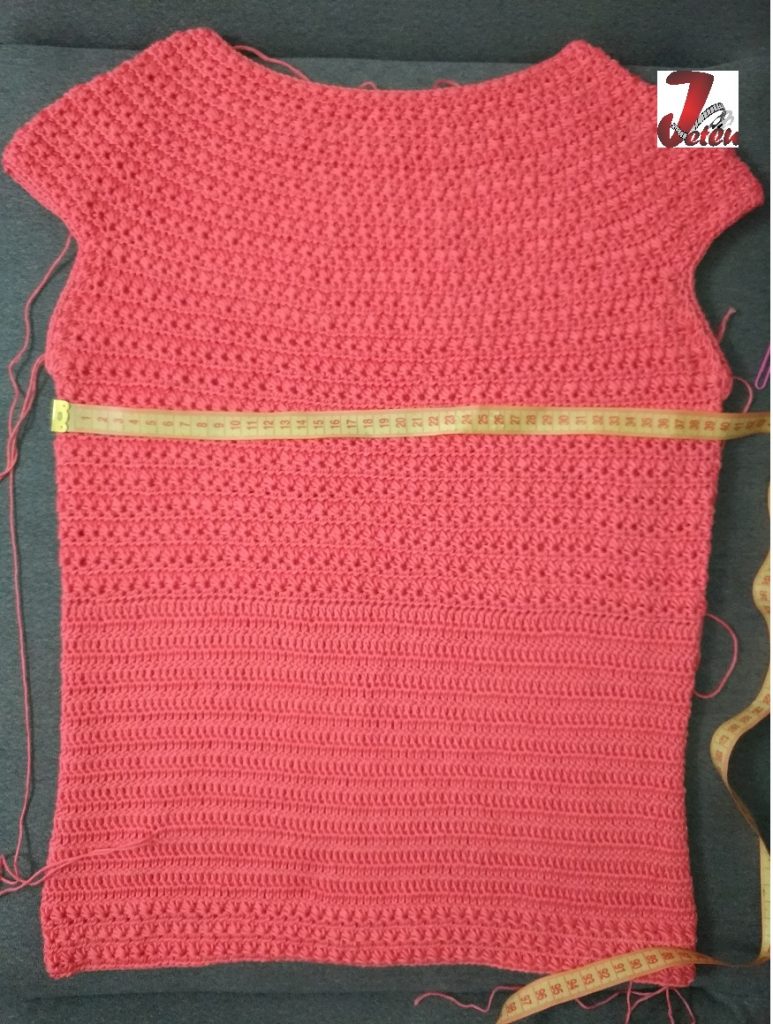
Sleeve finish:
We work around the cut of the sleeves one complete row with star stitch, meaning two crocheted rows.
I sewed all the remaining threads through the fabric and eventually you can accessorize the bluse with some crocheted flowers.
Have fun crocheting!
Va las si cateva poze cu ea imbracata.
Be First to Comment